You are determined to start blogging, tell the world what's in your mind. That best way to start, get your own self-hosted WordPress blog. Why self-hosted WordPress blogging? it's because of your website, blog, creativity, content is not locked with a single provider. If needed, you can freely move your website to a different provider and customize your WordPress blog until your mind gets satisfied.
Before you get started with WordPress blogging, you need a great domain name. Well, you can find and register your favourite domain name (.COM, .Blog, .IN etc) with Namecheap or Name.com.
Next, you need a reliable (cheap and affordable) WordPress hosting partner. I would personally recommend Bluehost web hosting for your WordPress hosting. They are one of the popular web hosting companies who are even officially recommended by WordPress itself. They offer one of the advanced WordPress hostings, packing blazing fast SSD hardware, NGINX+ Cache server configuration, worldwide CDN powered by CloudFlare and full HTTP/2 support. Simply, Bluehost offers you a speedy and high-performance WordPress hosting. One more thing, you also get a free domain with all of their hosting plans.
Complete Guide to setup WordPress on Bluehost
So, you have got a great domain name and a perfect WordPress hosting from Bluehost. The best part of hosting on Bluehost is that you get a simple to use CPanel control panel. They have a one-click script installation tool that allows you to easily install WordPress or any other web platform. Now, get started with installing your WordPress blog on Bluehost.
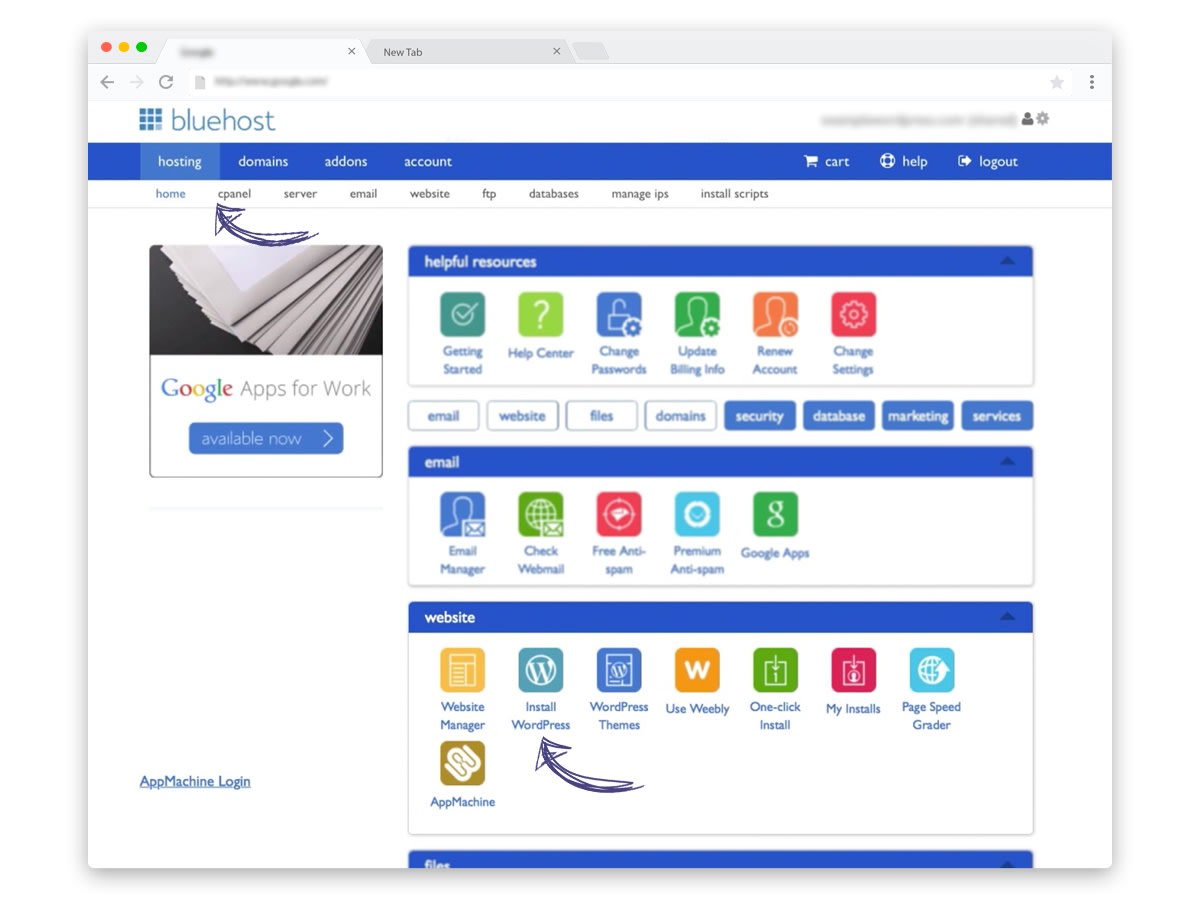
Step 1: Log in to your Bluehost.com account and head over to the control panel. Choose the 'Hosting' section from the top part and get to your hosting CPanel.
Step 2: You need to scroll down to the 'Website' section, where you would find an option to one-click 'Install WordPress'. You will be now redirected to the 'MOJO Marketplace' for installing WordPress (this will be under 'Scripts and Platforms').
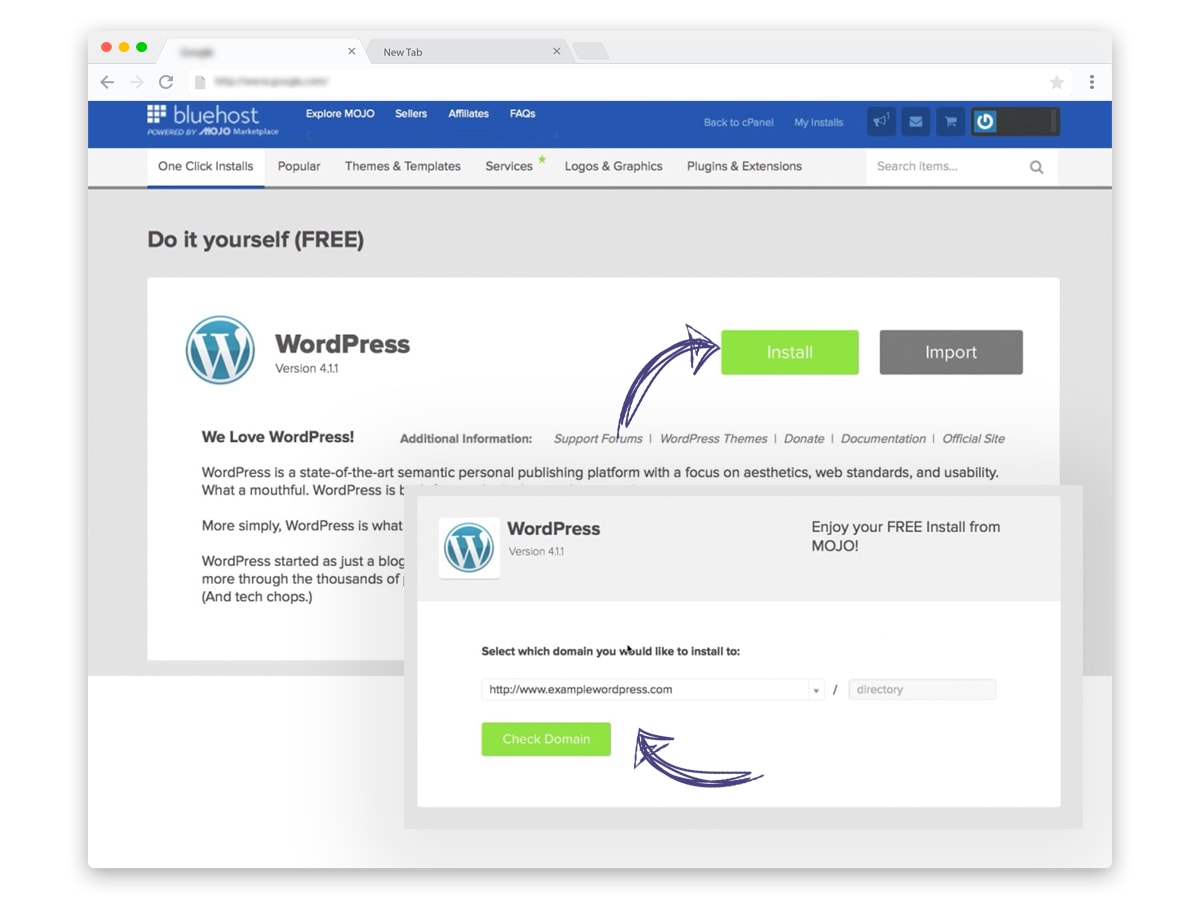
Step 3: A new installation window will open where you click on the 'Install' or 'Start' button that will start the one-click install process for WordPress on Bluehost.
Step 4: On the next step, select the domain name, where you want to install WordPress. You can choose the domain name from your Bluehost account or a domain registered with another domain registrar (make sure to point the domain DNS to Bluehost) or a subdomain or a folder for one of your domains.
Sometimes, you may get a warning saying 'Some files already exist that location'. Don't worry about it, you can check the box to overwrite any files in that location and click continue.
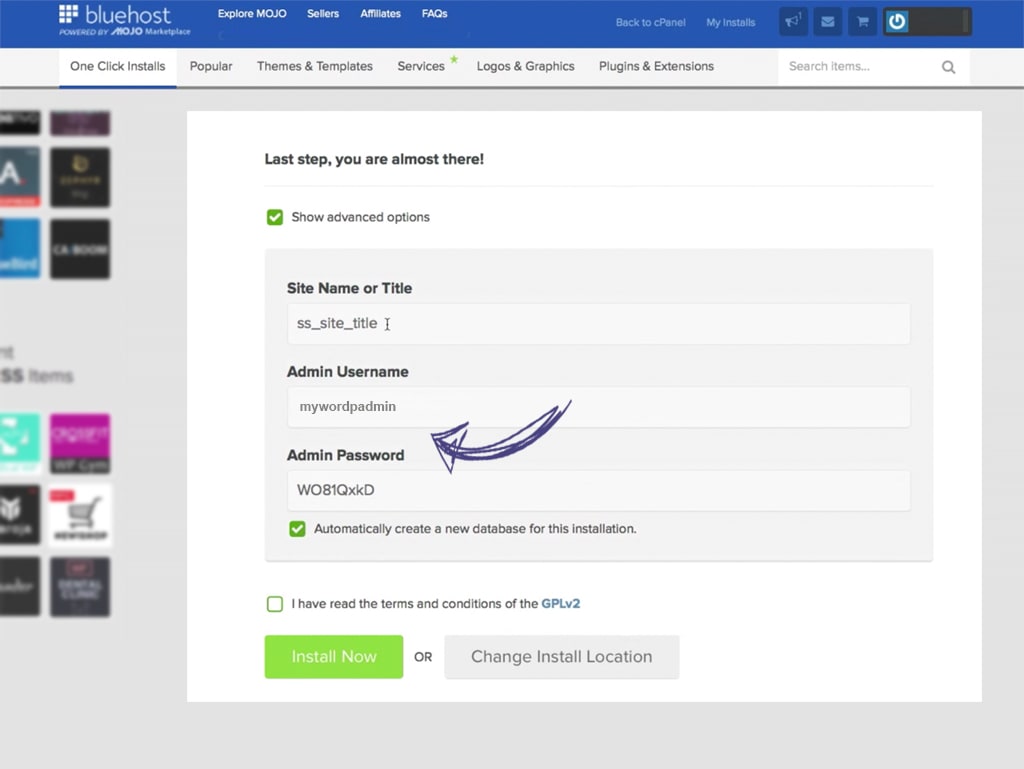
Step 5: Now, in the next step click to show the 'Advanced Options'. It's important to choose this, as here you are taking the first step to WordPress security. Select your WordPress username (choose anything, other than 'admin') and a super-strong WordPress password. Also, keep a checkmark on 'Automatically create a new database for this installation' box. Proceed with the installation by clicking on the 'Install Now' button.
Rest of the WordPress installation on Bluehost takes a few seconds. There will be a progress page which will show you the status of your WordPress installation. Wait a few seconds and don't close the page until you see 'WordPress is fully installed' message.
Along with the installation success message, you will be shown your WordPress site URL, the WordPress admin login URL, your WordPress admin username, and WordPress password. A copy of this information (except your password) will also be sent to your Bluehost registered email ID.

Yup, that's it! in a few simple steps you have successfully installed your WordPress blog on Bluehost. Here is a simple walkthrough video guide of the above steps to install WordPress on Bluehost.
What after WordPress installation
Login to your WordPress blog and start publishing your creativity. Start blogging! You can customize the look and feel of your WordPress site by choosing from thousands of free themes. Add additional functionality to your WordPress by installing plugins. Whatever you do, don't forget to backup and secure your WordPress blog.
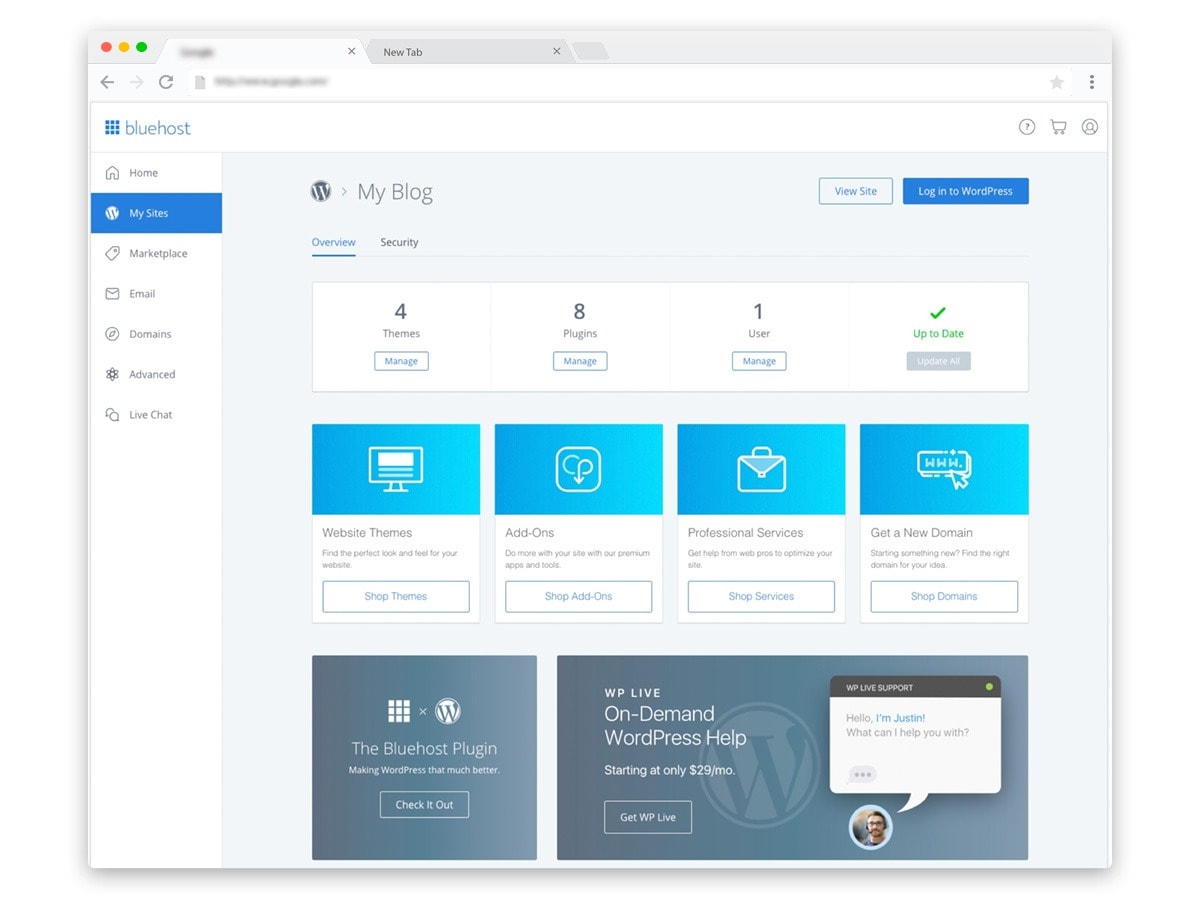
Bluehost now has a new platform where you can easily manage multiple WordPress sites installed on Bluehost. It's a perfect place for beginners to get started and set up their WordPress site. For pro users it offers advanced tools like staging environment, ability to change PHP versions (v5 to v7), caching control or access the full cPanel if they need it.
Don't forget to read our Guide to better WordPress Security - Update, Backup and Secure. Also, there is a guide to kick start your Website SEO with Microdata or Structured Data or Schema. Want to optimise your WordPress blog for mobile devices? implement Google AMP for WordPress site.
If you have any doubts in installing WordPress on Bluehost or got stuck in anywhere in the process, let me know in the comment section below.